

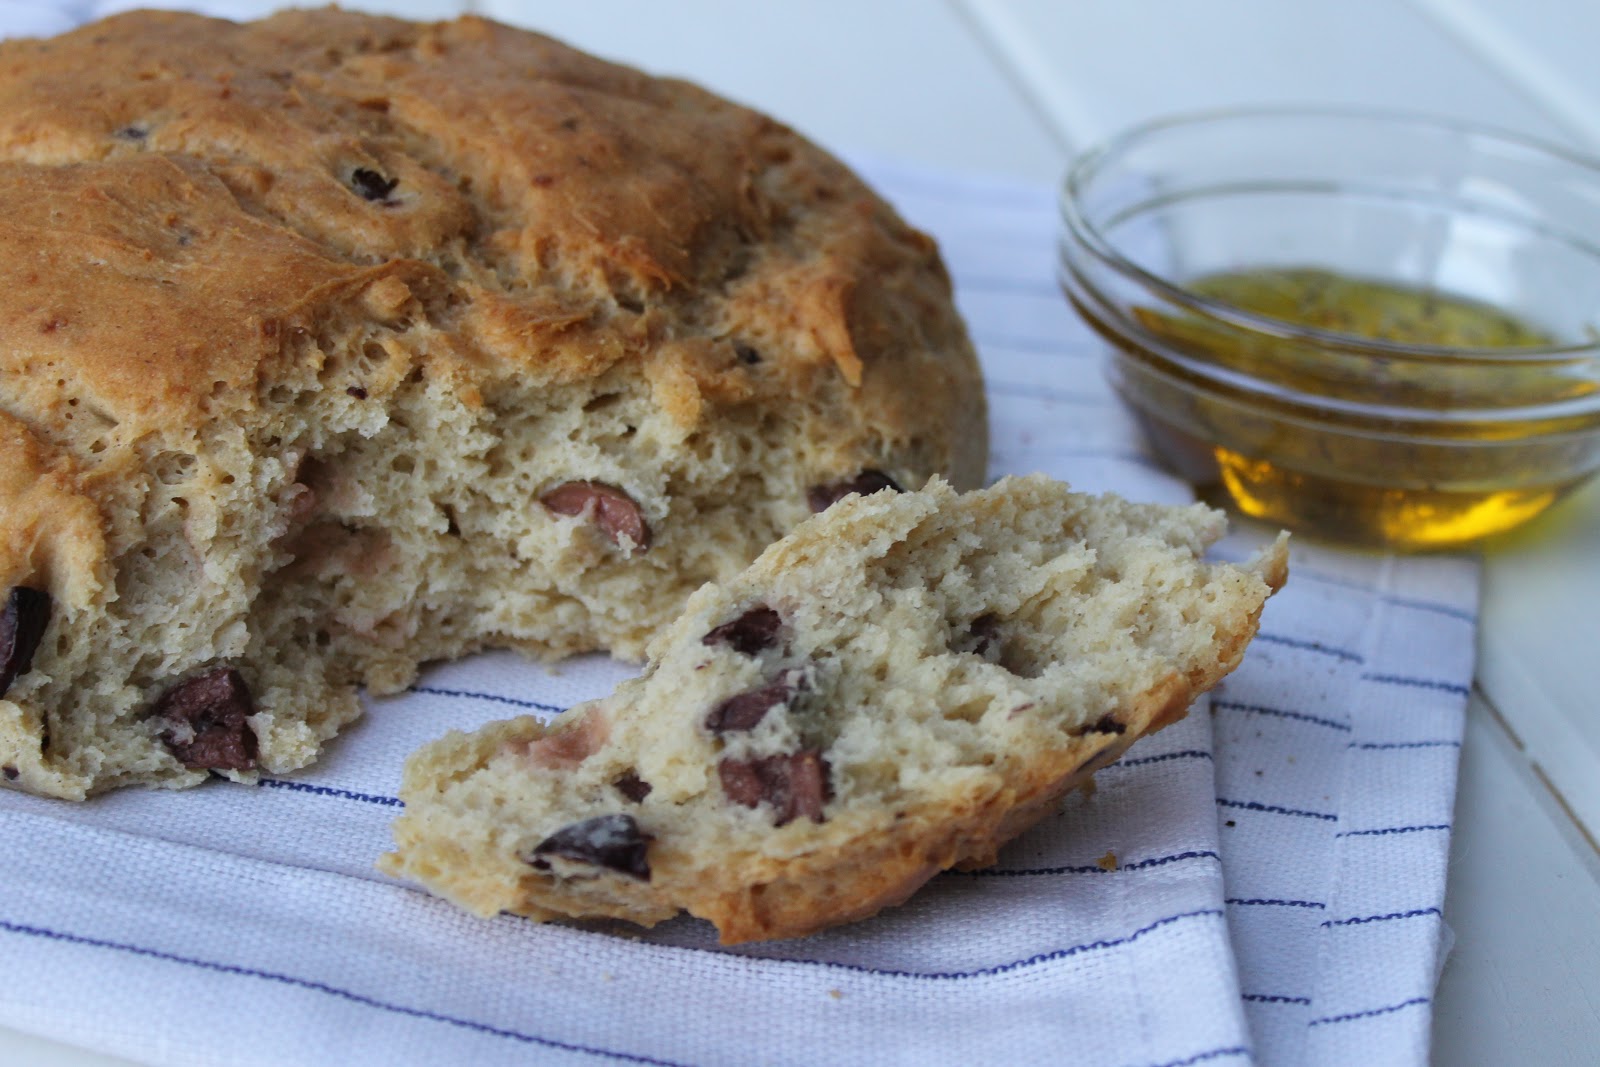
Today was a relatively lazy, cold, and cloudy Saturday. It was the perfect kind of day to attempt baking gluten free bread. Until now I have tried to stay away from bread for fear that it will come out of the oven hard as a rock, fallen in the middle, or failed in some other way. But today I was very very pleased thanks to a great basic recipe by Karina of gluten- free goddess Recipes. The bread was indistinguishable as gluten free and oh so flavorful.

Because of the clouds, a smaller number of hot air balloons went up this morning. It was one of the last days of the Balloon Fiesta. I have enjoyed watching the whimsical floating shapes rise above the mountain through the kitchen window for the past couple of weeks. I love the way the sunlight and the clouds set them in a ethereal haze.


I love these peppers that I bought a while back at the farmer's market. They are so tiny yet they pack a punch. I decided to pickle them right away to capture all of their freshness, spiciness, and sweetness.

The pickles pair perfectly with burrata cheese. The vinegar and cream are surprisingly harmonious. And the peppers are almost like little bright balloons floating atop a cloud- like dollop of creamy goodness :)


If you are like me, and have a fear of attempting an authentic gluten free bread, then I encourage you to try this olive bread. I really haven't been able to stop raving about it. I'm sure you will understand when you taste it.
Celebrating the small things in life- they are the best.


Olive Bread (GF)
makes one 9-inch round
1 1/2 cups sorghum flour
1 1/2 cups potato starch
1/2 cup almond flour
1/2 cup brown rice flour
2 teaspoons xanthan gum
1 1/2 teaspoons sea salt
1 1/4 cup warm water (115 degrees F)
1 teaspoon granulated sugar
1 packet active dry yeast
2 eggs, beaten
3 tablespoons olive oil
1 teaspoon lemon juice
3/4 cup kalamata olives, drained well and quartered
1. Turn oven on and off to warm it up. Line a 9-inch cake pan with a round of parchment. In the bowl of a stand mixer, combine sorghum flour, potato starch, almond flour, brown rice flour, xanthan gum, and salt.
2. In a large measuring cup, add the sugar to the water and dissolve. Add the yeast, stir, and set aside until the yeast gets foamy and poofy.
3. Add the poofed yeast and liquid to the flour and begin beating to combine. Add the eggs, olive oil, and lemon juice. Beat for a minute or two until the dough is smooth.
4. Toss the olives into the dough and stir to distribute. Scoop the dough into the prepared pan, shape and smooth the top with oiled hands.
5. Set the pan in the warm oven, on the center rack, and allow the dough to rise. I let mine rise for about 40 minutes to create a fuller, taller round. You can reduce the rise time to create a flatter bread or wait until it is doubled in heigth for an even heftier bread.
6. When the dough has risen, keep the bread on the center rack and turn the oven on to 375 degrees F. From the moment you turn on the oven, set a timer for 20 minutes. At 20 minutes, take the bread out of the oven and brush the top with olive oil. Place back in the oven and bake for about 10-20 minutes more.
Recipe adapted from Karina's (of gluten-free goddess Recipes) Gluten- Free Sun-Dried Tomato Bread
Pickled Hot Cherry Peppers
makes 2 quart-size jars and 1 pint-size jar
2 pounds hot cherry peppers, washed well and dried
6 garlic cloves, halved
3 dried bay leaves
3/4 teaspoon whole black peppercorns
1 tablespoon crushed red pepper
4 cups white-wine vinegar (at least 5 percent acidity)
1 1/3 cups water
1/4 cup sugar
1 1/2 teaspoons coarse salt
1. Trim cherry pepper stems. Divide peppers, garlic, bay leaves, peppercorns, and crushed red pepper among 2 quart-size and 1 pint-size sterilized glass jars.
2. Bring vinegar, water, sugar, and salt to a simmer in a medium saucepan over medium heat. Cook until sugar dissolves. Pour hot pickling liquid over peppers, leaving 1/4- inch head-space at tops. Can in water bath for 15 minutes. (Unopened pickled hot cherry peppers can be stored at room temperature for up to 1 year).
Recipe very slightly adapted from Martha Stewart Living March 2010
Looks delicious! I also love your photos of the balloons! You are so cool :)
ReplyDelete